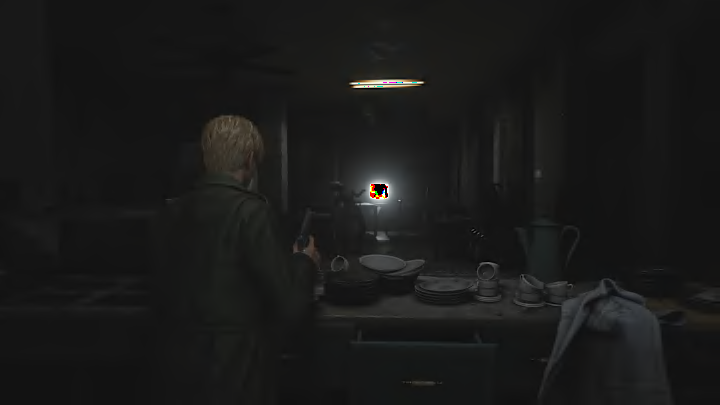
Silent Hill 2 remake Brookhaven Hospital complete guide and walkthrough

Brookhaven Hospital is where Bloober’s horror game kicks into gear, as I said in my Silent Hill 2 remake review. Each puzzle in this multi-layered nightmare dungeon feeds into the next until they’re impossible to separate, so I’ve opted for a full walkthrough for this section of the game, focusing on the puzzles and key moments.
I won’t hold your hand through every step, but I’ll talk you through all the major blockers, puzzles, and Key Item locations.
Note: This walkthrough is intended for Normal and Hard difficulties.
SH2 remake’s Brookhaven Hospital Reception padlock: Nurses, Doctors, Trees – Normal Difficulty
To get into the basement at Brookhaven Hospital in the Silent Hill 2 remake, you need to crack a padlock code near the lobby as you enter.
As the Key Locker Note from the Reception Office suggests, you should report to the head nurse in Examination Room 3.
Smash your way into the room and you’ll find a note tucked away in a drawer. It reads: “Wrote it down for you in a way you should finally be able to remember. Once you’re in the lobby, just look around. Now remember: Nurses, Doctors, Trees.”
She’s referring to the photos in the lobby area, where you’ll find pictures showing seven nurses, two doctors, and four trees.
The combination is: 724
Continue on and you’ll eventually reach the second floor.
When you reach the Nurses Station on Brookhaven Hospital’s 2F, there’s a note on the door that reads: “The code has been reset to what we agreed on during yesterday’s meeting in the doctor’s lounge. Like I said, I don’t want anyone writing it down on little pieces of paper for me to find. Be responsible, people.”
You’ll get this a bit later as you track down the bracelets for the Director’s Office.
SH2 remake’s Brookhaven Hospital Reception padlock – Hard Difficulty
The note in Exam Room 3 is different on hard difficulty and it now reads:
“If two is the number of nurses you’d still be one short. As two are dead and one is a fraud.
The third chops the firewood in half.
The first is singular.”
The first is just 1 as in a single number. Two refers to the picture of the nurses again, but you need to subtract 3 and add 1, leaving you with 5. For the third, you need to halve the number of trees at the hospital leaving you with 2.
The combination is: 152
SH2 remake’s Director’s Office bracelets
First up, you need to go into the Women’s Locker Room where the shotgun is and interact with the teddy bear to get the Bent Needle. Make sure to unlatch the door next to the Treatment Room near the stairs while you’re here, too.
Next, go to the Nurses’ Lounge and grab the L1 Room Key. Inside the L1 room you need to move a cart close to an opening that you can climb through. Climb through it into the adjacent room, then hop back into L1 through the open window to bypass the furniture blocking the rest of the room. From there, you can enter the Utility Room.
Interact with the wall here and James will climb into the space between the walls, which you probably didn’t sign up for but here we are. At the bottom, he’ll push a locker and you’ll reappear in a previously locked room between Medical Records and Restroom on 1F. Take the crawlspace to enter Medical Records.
In here, you’ll find the first item you need in the Director’s Office — the Marked Bracelet. Head back upstairs when you’re done and check on Maria.
Now head to the stairs in the northwest corner of 2F and go up. Check the metal door up top, near the save point, and you’ll see Laura again, then head down the other side of the corridor. In Exam Room 5 you’ll find the 1F Inner Ward Key — just smash the window to gain access — and from here you can also access the X-Ray Room. Note this down for later, but make sure you grab the Radiograph of a Pelvis and add that to the nearby X-Ray Viewer. You can also interact with D1 to note the location of another combination lock.
Now you want to head back to 1F and use that Inner Ward Key, which is for the door between the Restroom and the Locker Room. Take the corridor left and head to the Kitchen, where you’ll find Mold Remover. You can head through the Cafeteria here to loop back around to the Inner Ward corridor near the Dayroom more quickly.
Next, head through the Dayroom and into the Pharmacy, where you can hop out of the window into the Garden. In the Garden, head to the northeast to the Greenhouse and into the Pool room. In the adjacent Shower Room, you’ll find a Medical Tube which you can combine with the Bent Needle. Take this back to the Pharmacy and use it on the drain, but make sure to pop into the Doctor’s Lounge and grab the Keypad Combination Note first. Using the Medical Tube With Bent Needle on the drain gets you the Maintenance Key — head back to the Pool and use it on the locked grate to access the Pool Pump and drain the water.
Inside the pool there’s some graffiti of an eyeball — swing your pipe at the wall here to break it apart and you’ll get the Bloodstained Bracelet.
Now head back to the Nurses’ Station on 2F and use the Keypad Combination Note to crack it. The note draws a line through the keys you need to press — 3578. Inside you’ll find the Moldy Radiograph, which you can clean up by combining it with the Mold Remover.
Now head back to the X-Ray viewer. Place all the X-rays you have on the viewer and line up the markings on the photographs with those on the whiteboard. Done correctly, you’ll highlight a series of numbers — 4, 37, 12. This is the combination for the lock just outside of the room, on D1, and the directions are painted on the door itself. For me this meant right to 4, left to 37, and right to 12. Only press the “accept” button when you’ve done all three numbers, like a proper safe — be careful about accidentally overshooting as you turn the lock!
Interact with the bed inside the room and you’ll get the Filthy Bracelet. You have everything you need to head back to the Director’s Office and interact with the hand on the desk.
Use all three bracelets on the plastic hand on the Director’s desk, placing the bloodied one up top and the filthy one at the bottom. Now you need to look at the cut marks on the fake limb and match them with the top bracelet. For the other two, you’re looking for two clean numbers next to each other. My numbers read 92, 45, 71.
When you’ve got it correct, the hand will open and present you with the Director’s Storage Room Key.
SH2 remake’s Director’s Office safe
Use the Director’s Storage Room Key on the door next to the nearby save point. Inside you’ll find the missing Safe Button. Next to that, there’s a series of books with glyphs on them and numbers at the bottom — this is your cipher to solve the safe in the Director’s Office, but first you need to order the books properly by lining up the pictures. Here’s how it should look:
Now head to the safe the other side of the Director’s Office and replace the missing Safe Button. Then you need to enter the code on the bracelets by matching numbers to the symbols on the books. The safe will open and grant you the Rooftop Key.
Once you’ve been onto the roof, you’ll end up in a boss fight before being thrown back into the hospital in the “other” world. Here you’ll have to solve a series of locks to escape.
SH2 remake Brookhaven Hospital corrupted
You start on 1F next to the Dayroom and there’s only one way you can go. Head to the elevator and up to 2F to find the aforementioned lockbox next to the Nurses’ Station.
Now take the stairs in the northwest corner up to Exam Room 4 and you’ll find an Instrument of Force next to a mannequin. Interact with the dummy’s left arm and you can use the Instrument of Force on its elbow. You can then move its right arm up, revealing the eye socket, but there’s nothing you can do here… yet.
Hop through the opening opposite the dummy and follow the corridor around. Take a left where the path splits and destroy the breakable wall — inside you’ll see a chain leading down a ladder. Climb down. Make your way through Medical Records and go through the gap in the wall to the unnamed room at its northwest, where you’ll find the Key of Bliss. Head back up the ladder and use this on the mannequin to get the Lapis Eye Key, which you can use on the middle of the lockbox.
For the next part of the lockbox, you’ll find a Calendar Page in M2 (break through the wall from M3) that reads: “1 year they’ve been watching me. So many pills they fed me. When a loud hour comes, I tremble every time the light falls.”
For the combination, you need to count the pills in the sink, look through the peephole and count how many times the light outside flickers, and look at the time you set on the clock.
Now head back to the lockbox and use the combination lock with four digits. For me, the combination was 1622. One year, six pills, 2am, two light flickers.
Next, head to the Observation Room where you’ll find the Director’s Office Key in front of a television. Head to the Director’s Office.
Inside you’ll find a ladder leading up. There’s an electric therapy bed here but you need to push on through the padded cells first and turn on the generator. Once done, head back and power the machine up and the burn will reveal the final keypad code: 9659. Input this on the final keypad.
After a short cutscene, you’ll get the -1 Elevator Button. Head to the nearby elevator and put it in to escape the hospital.
